So you’ve opened your beautiful LINGLONG JUHUO ear seed kit, and you’re ready to begin a new self-care ritual. The journey to balance and wellness is literally at your fingertips. You might be wondering, “how to apply ear seeds for maximum effect?” Don’t worry, we are here to guide you. This simple tutorial will walk you through the entire process, ensuring your first experience is confident and rewarding. You can always explore the full collection for more inspiration.
Preparing for Your Self-Care Ritual
Before you begin, take a moment. This isn’t just a procedure; it’s a mindful act of self-care. Preparing your space and tools is the first step in this empowering self-care ritual.
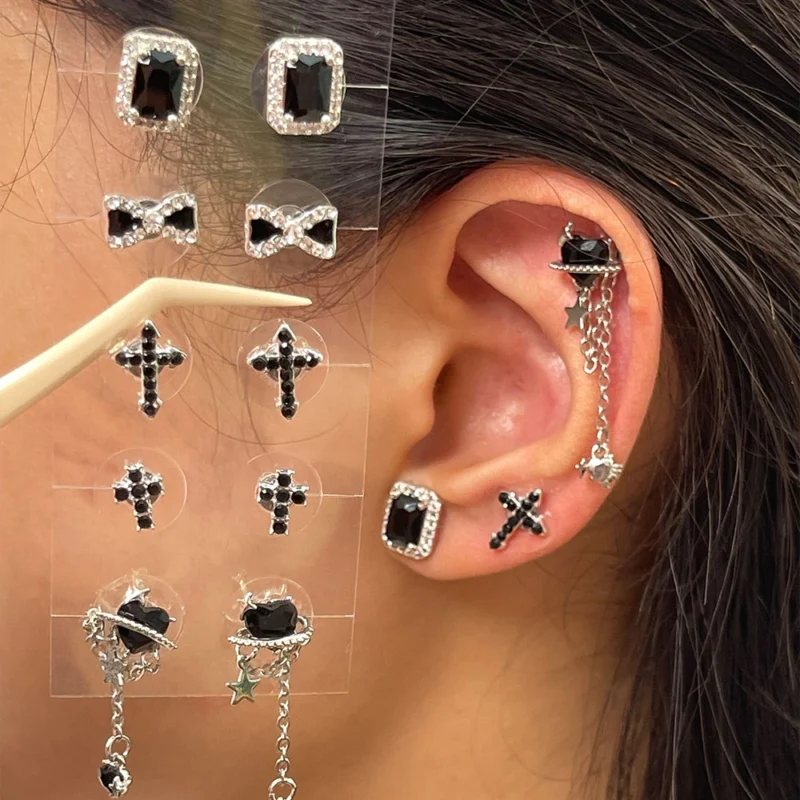
What’s Inside Your LINGLONG JUHUO Ear Seed Kit?
Familiarize yourself with the components. Your kit should contain the ear seeds on adhesive tape, precision tweezers for application, and a chart showing key acupressure points. Knowing your tools builds confidence.
Creating a Calm and Clean Application Space
Find a quiet, well-lit area. A calm environment enhances the experience. Ensure your hands and ears are clean to create the best surface for the seeds. This simple preparation makes a significant difference.
A Step-by-Step Guide to Ear Seed Placement
Ready to begin? Follow these steps for precise and effective ear seed placement. This process is gentle and intuitive once you get the hang of it. We design our ear seed kits to be user-friendly.
Step 1: Cleansing the Ear to Ensure Adhesion
First, gently wipe the outer surface of your ear with an alcohol pad. This removes any natural oils from the skin. A clean surface ensures the adhesive will stick properly and last longer.
Step 2: Identifying the Correct Acupressure Points
Next, use the provided chart to locate the desired points. You can also gently probe the area with a clean finger or the tip of the tweezers. Often, a tender spot indicates an active and effective point.
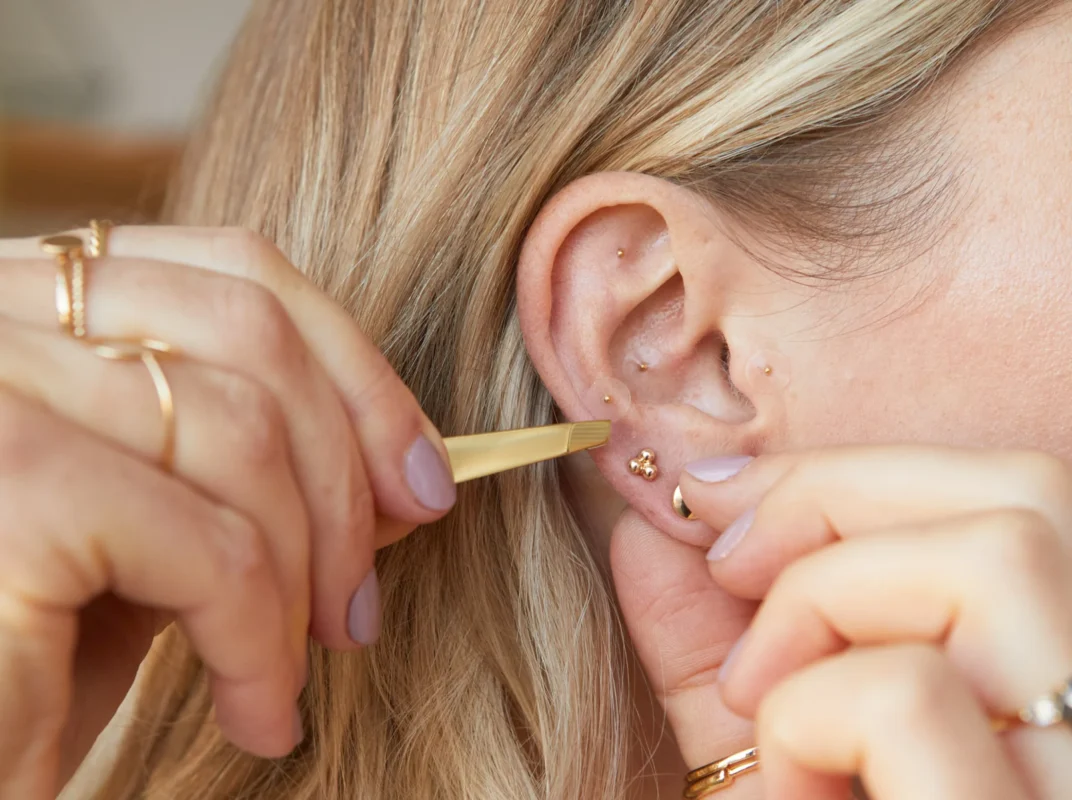
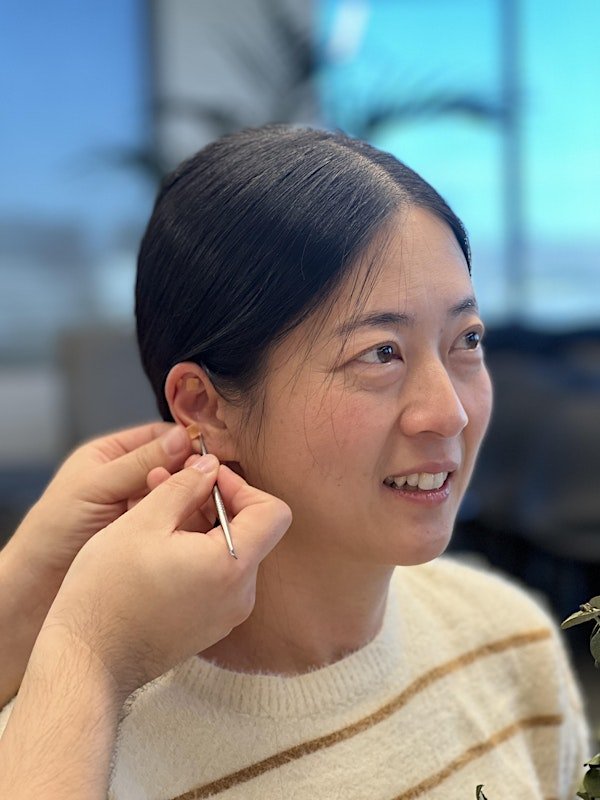
Step 3: Applying the Ear Seed with Precision Tweezers
Now, carefully peel one ear seed from the tape using your tweezers. Place it directly onto the identified acupressure point. Press down gently but firmly for a few seconds to secure it.
Step 4: Activating the Seed with Gentle, Mindful Pressure
Once the seed is in place, activate it. Use your fingertip to apply gentle, circular pressure on the seed for about 15-30 seconds. This mindful touch begins the stimulation process.
Aftercare: How to Maximize Your Ear Seed Benefits
Your ear seeds are now applied. Proper aftercare is crucial for getting the most out of your wellness jewelry. It ensures both effectiveness and comfort.
How Often Should You Press Your Ear Seeds?
To keep the points stimulated, gently press on your ear seeds 2-3 times per day. This is especially helpful when you are feeling the symptoms you wish to address. A few seconds of pressure is all you need.
Understanding How Long to Wear Your Seeds
You can wear your ear seeds continuously for 3 to 5 days. This duration provides consistent stimulation. After 5 days, it is important to remove them. You can always find replacement seeds on our website.
The Importance of Safe Removal and Skin Rest
To remove, simply use your fingernail or tweezers to peel the seed off. Always give your skin a rest for at least 24 hours before applying a new set. This allows the skin to breathe and recover.
Pro-Tips for a Flawless First Application
Want to make your first experience even better? Here are a few expert tips. These small details can enhance the process.
Using a Mirror and Good Lighting for Accuracy
Good visibility is key. Use a magnifying mirror and ensure you are in a well-lit space. This will help you see the small contours of your ear for perfect ear seed placement.
What to Do If an Ear Seed Falls Off Prematurely
It can happen. If a seed falls off, simply discard it and apply a new one to the same spot if you wish. Do not reuse an old seed.
Embrace Your New Empowering Wellness Practice
You’ve done it! Applying your first ear seed is a simple yet profound act of self-care. You are now actively participating in your own wellness journey. Remember that consistency is key. Embrace this new ritual with patience and curiosity.
Which acupressure point are you most excited to start with? Let us know in the comments below!
Your Ear Seed Application Questions, Answered
Can I shower or swim with my ear seeds on? Yes, the adhesive is designed to be water-resistant. You can shower and go about your normal routine. Avoid directly scrubbing the area to ensure they stay on.
What does it feel like when an ear seed is placed correctly? You should feel a gentle, consistent awareness or a slight tenderness when you press on it. It should not be painful. This sensation indicates an active point.
Is it better to apply seeds to one ear or both ears? For general wellness, you can alternate ears with each new application. For specific issues, some practitioners recommend applying seeds to the ear on the same side of the body as the symptom.
Where can I find a reliable ear seed placement chart for specific issues? Our kits come with a foundational chart. For more detailed guidance, we invite you to explore the resources at LINGLONG JUHUO.